Our superheroes just hosted a great webinar on Marketo’s new Data Retention Policy, and we want to share some of our success strategies with you! Hosting a webinar can raise awareness for your business, help you develop trust with your target audience, and boost your email list. Luckily, Marketo makes it easy to set one up–-but are you using webinars to your full potential?
If you want to create the perfect webinar, just follow these four tips:
1. Set up a LaunchPoint Partner
Marketo LaunchPoint lets you easily integrate your Marketo instance with a wide variety of external platforms, without the need to set up API calls. Aside from the ease, there are several other reasons to use LaunchPoint, including:
- Better branding: You can control the look and feel of all of your webinar-related assets in one place.
- Better reporting: Since every part of your webinar is managed in Marketo, you will be in a position to get the best reporting possible.
- Automated forms: Any forms you use will automatically be pushed to your webinar platform. (Just remember that you’ll need to set your program status to “Registered” in Marketo, first)
- Complete status updates: Once the webinar is complete, all attendee and no-show information will be automatically updated in Marketo with the correct program statuses.
Which webinar services available through LaunchPoint? Here’s our list of preferred webinar partners, along with links to instructions for integrating each service with Marketo:
WebEx
Adobe Connect
ON24
ReadyTalk
BrightTALK
GoToWebinar
2. Create a Template
Taking the time to build out a webinar program template that can be cloned and reused later on can save you lots of time. Not to mention it also makes sure that your webinars have a consistent design and layout, which aids in branding purposes. Plus, using templates can also significantly cut down on errors. That’s a win-win-win!
3. Use Tokens
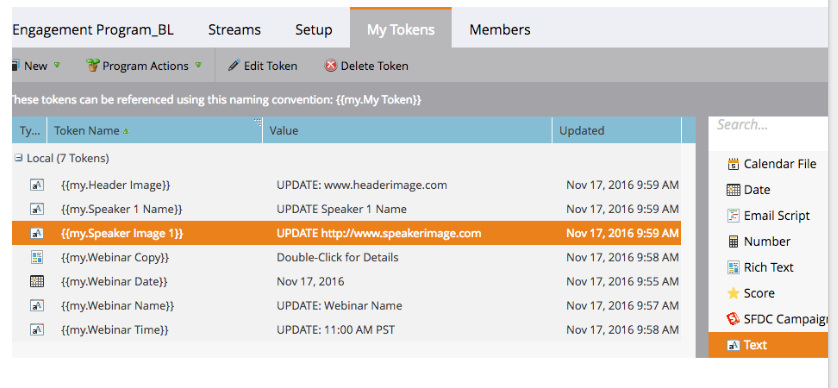
Since webinars typically include the same information (date, time, speaker(s), topic, etc.) custom tokens can be used in a program template to automatically insert these details. The result? You can drastically reduce the man hours it takes for your team to create a webinar.
Just don’t forget to add tokens to the landing pages and emails associated with your webinar! Doing so will help you maintain consistency and reduce the time it takes to build out each webinar program.
After the initial setup in the program template, all of your text and images can be easily updated through tokens within the program setup. Actually, you won’t even need to open your emails and landing pages.
Here’s how it will look when you’ve added tokens correctly:
4. Remember to set and send auto-reminders
We love the “date” token in Marketo. When applied under “wait steps,” this token lets you set a specific time period for your reminder emails to be sent out.
See below:
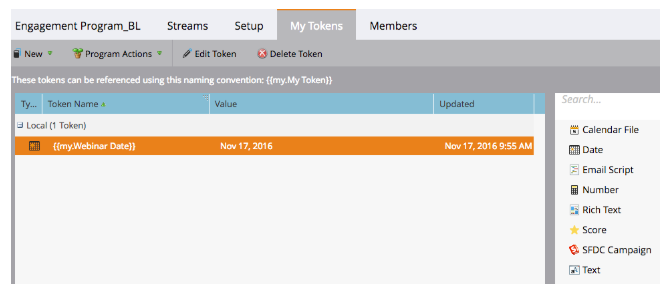
In this screenshot, you can see that the “date” token is being used in the wait step, where it has already subtracted one day from the token. This means that if the webinar’s scheduled date is November 3rd, auto-reminders aren’t scheduled to be sent out until November 2nd at 9:00 am.
Bottom line–-Marketo is a powerful tool, and when used to its full potential, it can make the setup and tracking of webinars and other events a breeze.
Want to join our next webinar? Sign up here, and you’ll be the first to know what our superheroes have planned next!

