Hoolicon, your company’s largest event, is coming back in 2020! Your marketing team is going full force to promote this event through marketing emails, sales outreach, telemarketing, direct mail, and so much more.
With all of the various acquisition channels you’re using to promote this event, you’ll want to track them using UTMs (short for “Urchin Tracking Module”) in your URLs. Otherwise, you’ll have no idea which channels led to which signups.
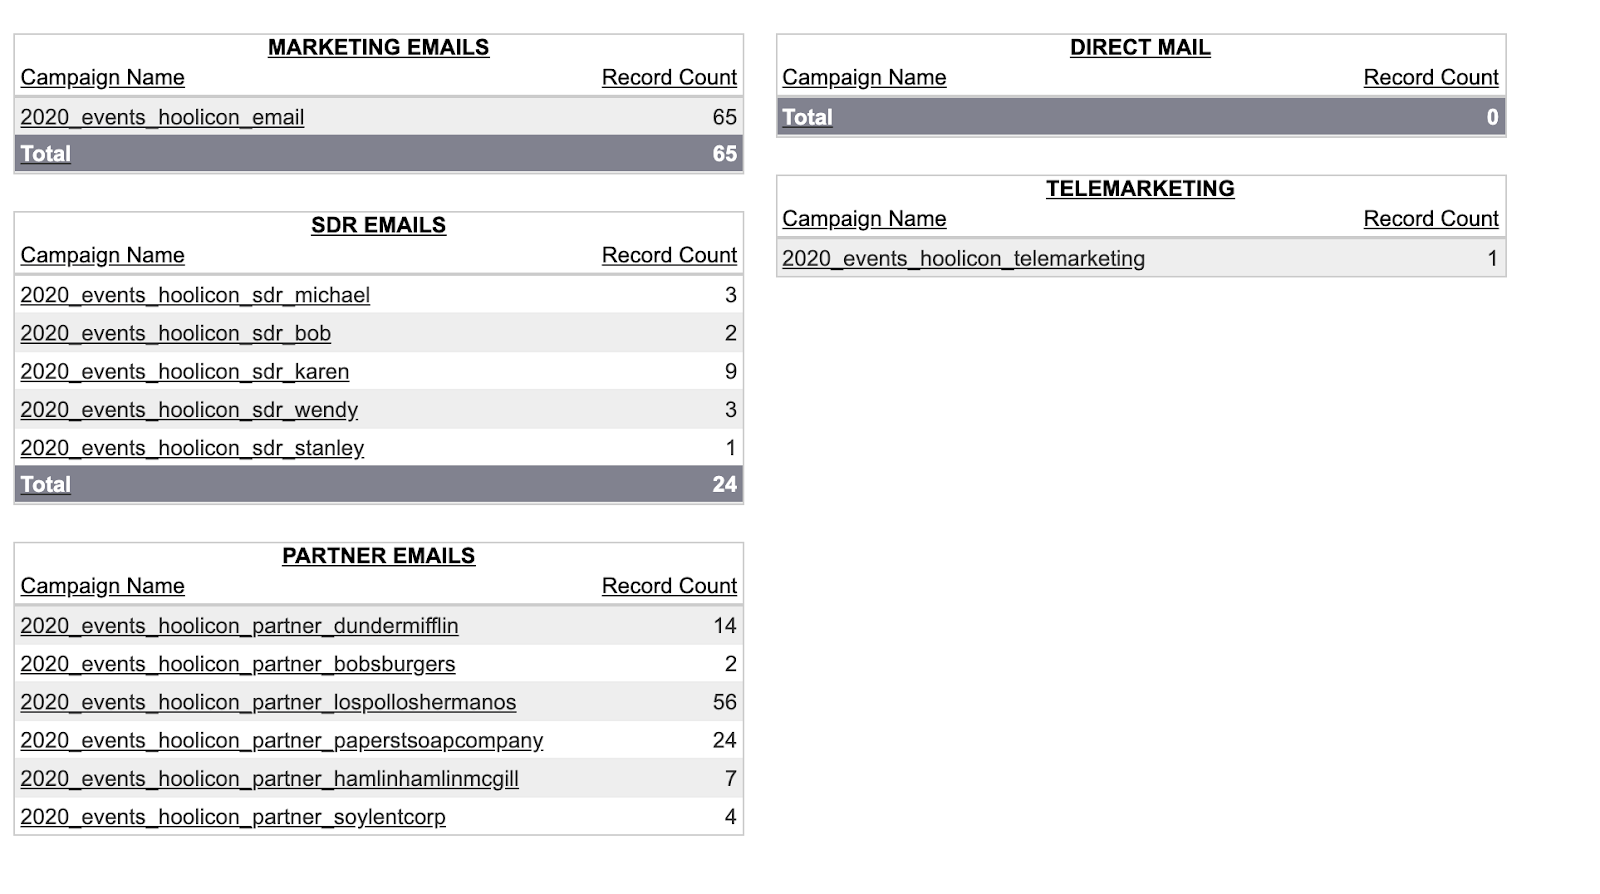
But how do we capture all of that data onto one screen for an easy visual that’s ready to share with your company’s executive team?
The answer is simple! Create one “Acquisition Channels” SFDC dashboard.
First, make sure that you have set up a global campaign in Marketo that adds leads to operational SFDC campaigns based on their UTMs.
The global logic should look similar to the following:
- Trigger: Data Value changes | Attribute is | utm_campaign
- Flow: Change Status in SFDC Campaign | Campaign is {{Lead.UTM_Campaign}} | New Status is Responded
Next, create an SFDC campaign for each channel’s UTMs.
Why would you add leads to SFDC campaigns when UTM parameters are available in SFDC reports? UTM parameters in SFDC may get overwritten—and that’s a good thing! People engage with your content in multiple ways. Adding someone to an SFDC campaign is a good way to save their UTM footprint in the event that the value gets overwritten in the future.
Then, make sure you have a solid naming convention for each of your Hoolicon acquisition sources.
For now, here are the operational SFDC campaigns we’ve created for Hoolicon 2020:
-
- Marketing Email:
- 2020_events_hoolicon_email
- SDR (sales) Emails:
- 2020_events_hoolicon_sdr_name1
- 2020_events_hoolicon_sdr_name2
- 2020_events_hoolicon_sdr_name3
- Direct Mail:
- 2020_events_hoolicon_dm
- Partner Emails:
- 2020_events_hoolicon_partner_partner1
- 2020_events_hoolicon_partner_partner2
- 2020_events_hoolicon_partner_partner3
- Marketing Email:
- Telemarketing: 2020_events_hoolicon_telemarketing
- Paid Media: 2020_events_hoolicon_paid
Next, you’ll use these SFDC campaigns as “utm_campaign” values for the various URLs.
Example (with the SFDC campaign name in bold):
www.hoolicon2020.com/register/?utm_source=google&utm_medium=email&utm_campaign=2020_events_hoolicon_email&utm_content=marketinginvite1
The fun starts once promotion begins! Track your efforts in SFDC by following 2 steps:
- Create Campaign Member Reports for each SFDC campaign or group of SFDC campaigns (ex: SDRs, Partners) *Note: Add a chart to each report (Not sure how? See here.)
- Plug your SFDC reports into a dashboard
To create a dashboard:
STEP 1: Go to the navigation bar of your SFDC instance and click “Dashboards.”
![]()
STEP 2: Click on “New Dashboard.”

*Note: if you don’t see these options, you may have to click “Go To Dashboard List” on the left-hand side, beneath the navigation bar.
STEP 3: Pick the type of charts you want in the “Components” tab and drag them to the right-hand side of the screen.
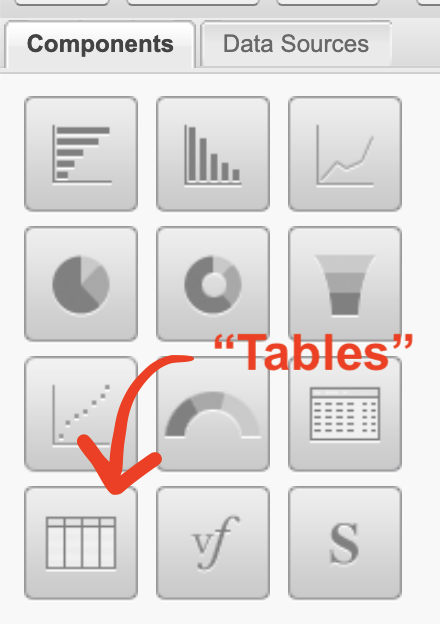
Some components such as “Gauge” and “Funnel” are visually cool to look at, but at the end of the day, I find “Tables” are the most effective component type for acquisition channel dashboards.
STEP 4: Pick your SFDC reports from the “Data Sources” tab to plug into your components.
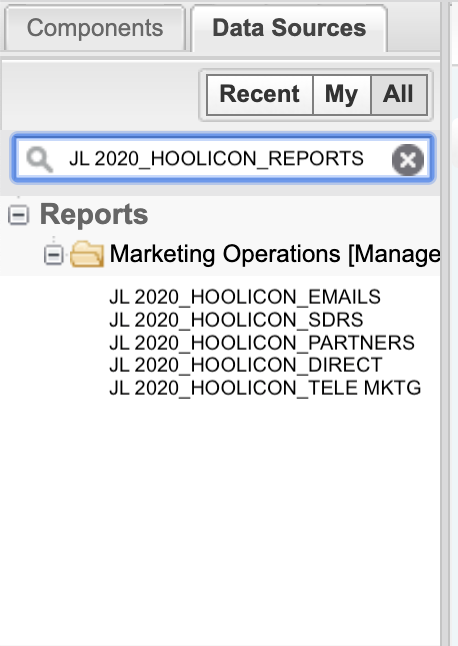
STEP 5: Drag and drop from the “Data Sources” tab to the components on the right-hand side.
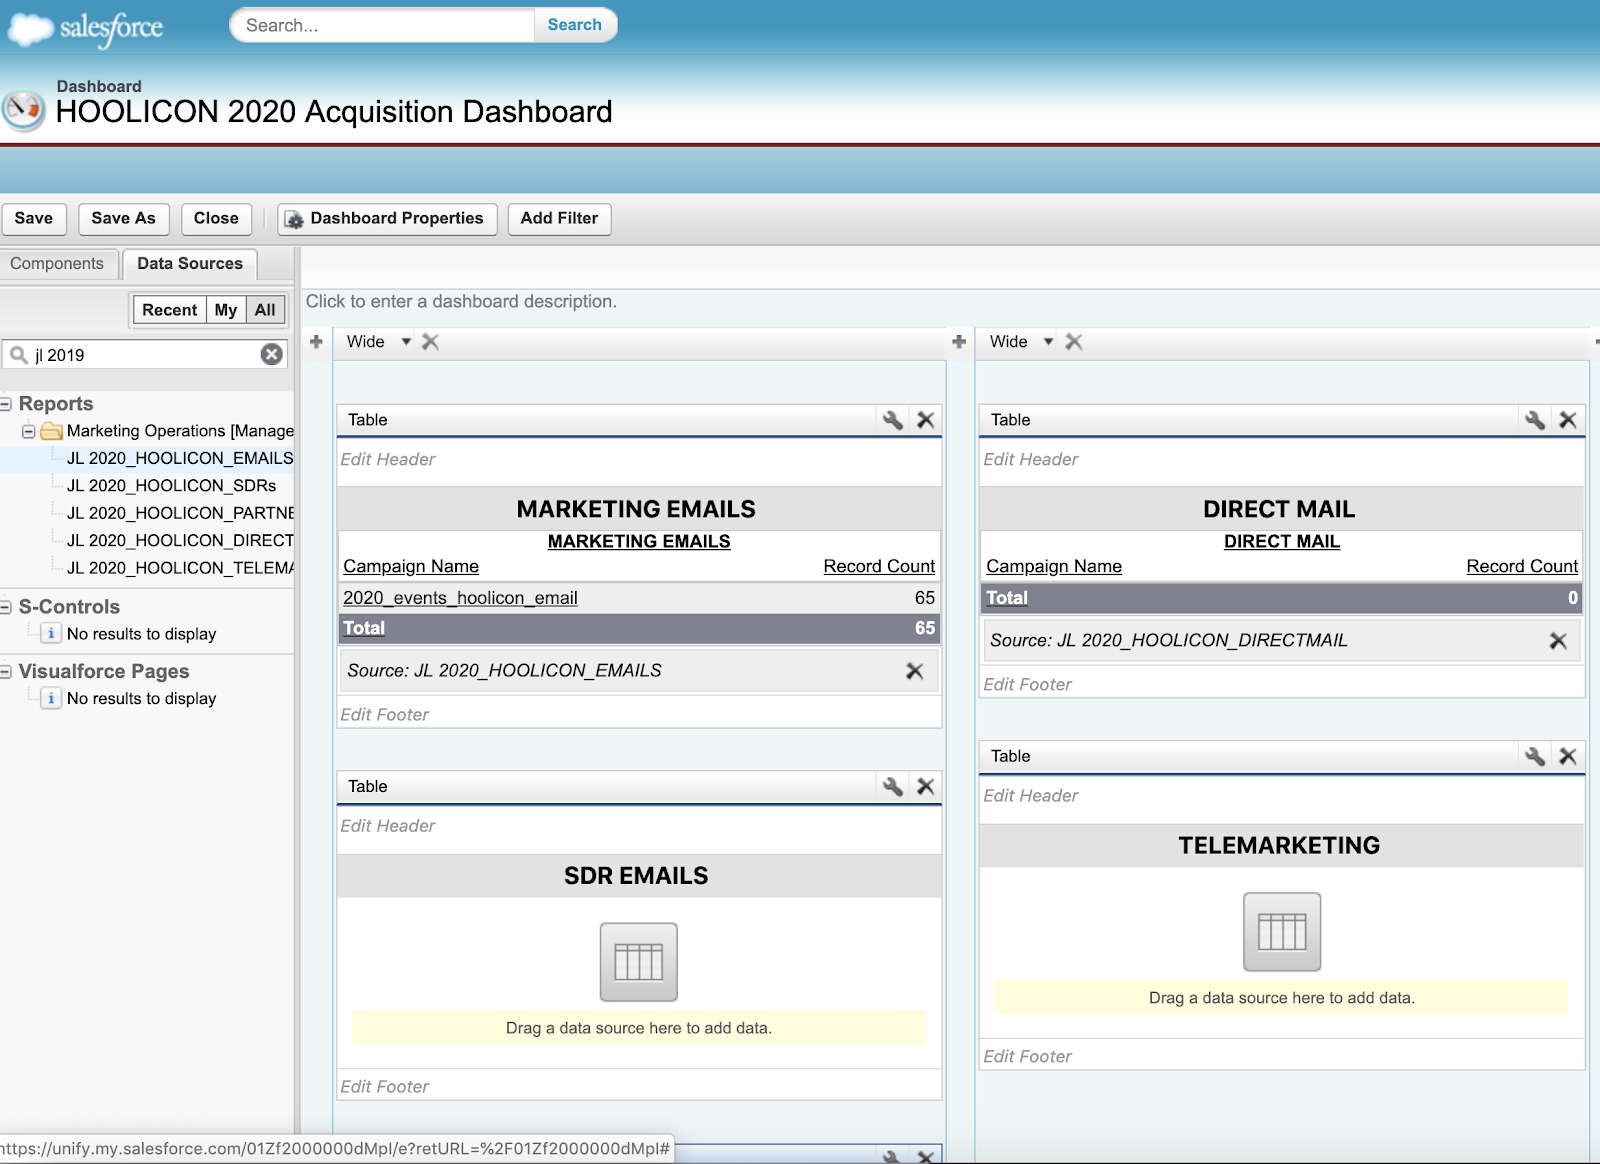
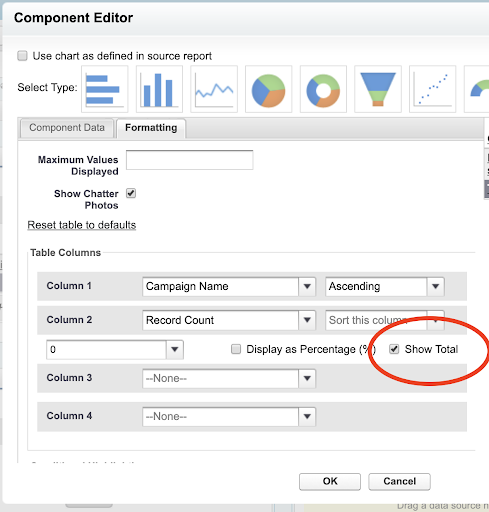
STEP 6: Click on the wrench icon (in the top right corner of each table) to customize your attributes. In the “Component Editor”, click “Show Total.” Repeat this for each of the tables.
STEP 7: Save your dashboard, and voila, it’s complete! Now you have one Acquisition Channels SFDC dashboard that updates in real-time.
